Click Here To Join Our Telegram Channel for FREE daily tutorials!
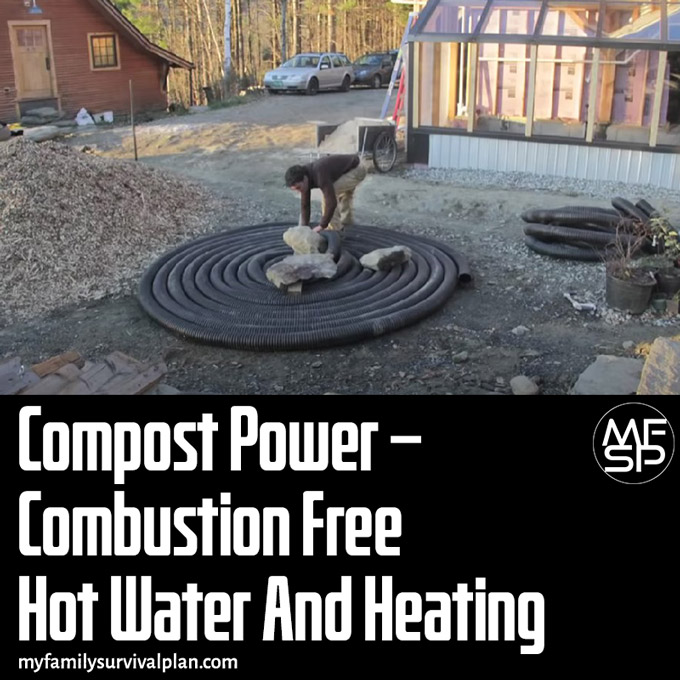
Compost Power – Combustion Free Hot Water And Heating. Photo – http://www.youtube.com/watch?v=Z3Z003uBn9Q
These two videos show “how compost power works” and how systems are built using either the modified Jean Pain method or the Agrilab Technologies Isobar method for larger scale systems. Below the videos is a step by Design Guide for Jean Pain style systems.
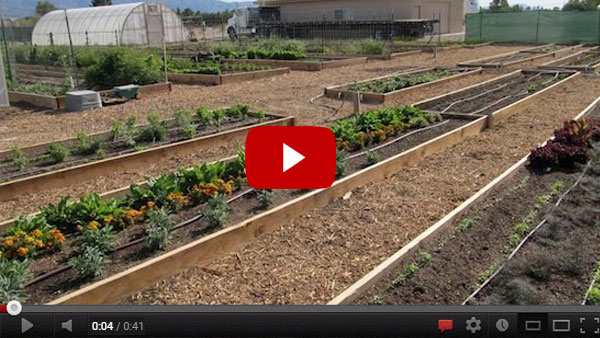
Video 1: Modified Jean Pain system built by Ben Falk of CompostPower.org for winter greenhouse heating:
Video 2: How the Agrilab Technologies Isobar system works to heat a large winter greenhouse at Jasper Hill Farm in Vermont:
Step-By-Step Instuctions for building a Mound de Pain
There are other ways to approach recipes, dimensions, aeration, and heat exchange pipe for Jean Pain style systems but this Design Guide gives details of one generic approach. Contact us for specific help with your project!
1. Location, Foundation:
The mound should be located as close to the destination for the hot water as possible but you’ll need space for a equipment (tractor, truck) to access at least one side of the mound. Construction starts by making a level aerated foundation surface by spreading large diameter dry wood-chips into approximately a two-foot thick circular pad that is 4 feet wider than the actual Compost Power mound will be. To encourage air-flow into the central/lower sections of the mound, it’s recommended to install a perforated pipe inside the foundation of wood-chips that extends from the outside edge of the foundation and is coiled into the central core of the foundation. Flexible 4-inch corrugated perforated drainage pipe is ideal for this but any perforated pipe will work. The perforated pipe can be coiled in a circular fashion under the lower section the foundation-layer, or straight-pipes can be laid across the foundation as the wood-chips are spread around on top of the pipe. If you have 30-40 cubic yards of “hot mix” (bark mulch or a mixture of mulch, chips, sawdust, manure) the diameter of the lower section of your mound should be 16-18 feet and the diameter of the foundation should be 20-22 feet.
2. Center, Outer-dimensions:
Mark the center and have a partner walk in a circle with a rope the same length as the radius you want the mound and foundation to be, marking the perimeter of the mound and the foundation with stakes. Leave a tall stake in the center of the mound.

3. Hot-Mix:
Loosely spread a 2-foot thick layer of “hot mix” or bark-mulch on top of the foundation, forming the lower-base of your Compost Power mound. Avoid compacting this material as much as possible while raking the material around.
4. Supply Pipe:
Now it’s time to set the pipes for “supply” (hot water that will come from the mound) and “return” (cold water that will circulate back into the mound): The “supply” pipe should be laid from the destination of your hot water across the center of the mound. Temporarily coil/tie this pipe to the central stake while leaving 10 feet of excess pipe that will eventually reach up to the top of the mound and connect to the top layer of pipe which will bring hot water back to your heating application.

5. Return Pipe:
We recommend using 300-foot spools of high-pressure poly (larger spools are hard to handle) while keeping the spool together using a cargo-strap. Lay the end of the “return” section of pipe next to the supply pipe extending from the destination of your heating application. Begin unrolling this pipe and coiling it around the center stake in as tight of the coil as possible without kinking the pipe. (2-foot diameter for the first coil). Gradually unroll the spool laying the pipe in circular rings from the center of the mound outward. Keep 8-10 inches of space between each coil on the first layer of pipe. Use cinder-blocks or large stones to temporarily hold the pipes in place as you coil them across the mound. For a 16-food diameter mound, you should be able to make 7-coils of water-line on the lower layers which amount to about 120 feet of water-line. The outer ring of pipe on the first layer should be 12-18 inches from the outer edge of the “hot mix”. Once the final ring is laid on the first layer, set the rest of the spooled water-line aside on the outer-foundation.
6. Hot-Mix:
Dump several yards of hot-mix on top of the coiled water-line, loosely spreading the material around with rakes, until the material is level with the top of the cinder-blocks. (cinder blocks serve to hold the pipe in place and as a “depth gauge” to make it easy to tell when each layer of the mix is thick enough). Remove the blocks and spread the material into the gaps where the blocks where. Each layer of hot-mix should be 8-10 inches thick. Avoid packing the hot mix down by using rakes to spread the material while standing on the outer-foundation.

7. Repeat #5 and #6:
For the 2nd and 3rd layers of coiled pipe, you’ll have a slightly more condensed footprint of the waterline compared to the first layer. As each layer of hot mix is spread over the pipes, the side-walls of the mound will begin to “cone” and get more narrow. This means you’ll need to gradually concentrate the rings of the coiled pipe more closely together (6 inches in between rings instead of 8-10). To get 900 feet of pipe into your mound which is the recommended amount based on 30-yards of hot-mix, you’ll end up with 7 to 8 layers of coiled pipe. For the 4th and 5th layer you’ll have to reduce the number of rings of coiled water-line from 7 to 6. For the 6th and 7th layer of coiled water-line reduce the number of rings from 6 to 5 while maintaining 6 inches of space between each ring and keeping the outer-most ring 12 inches from the edge of the mound.
8. Final Layer Supply Tie-in:
As you run out of heat-exchanging water-line on the top/final layer, use an elbow-coupling to connect the supply/return pipes together with C-clamps. Hit the end of the poly-tubing with a 10-second blast from a propane torch to make it easy to insert the coupling into the pipes. Then cover the final layer of water-coils with at least 18 inches of loose-filled hot-mix.
9. Outer Insulation:
Now the basic mound is complete, and the final step is to cover the entire mound with an air-permeable insulating layer of wood-chips or loose-packed hay. Use the outer-ring of the foundation-layer as the base where you can pile this insulating material up along the sides of the mound. A 12-24 inch thick layer of insulating wood-chips or hay will improve the winter-performance of the mound while still allowing passive aeration to keep the heat-generating microbes alive.
10. Plumbing, Pumps, Application-side:
Now it’s time to install a circulation pump and any water-storage tanks or manifolds that would split the circulation into hydronic heating zones. The simplest way to use this heat is to simply install a 1/8 or 1/16 HP pump in your basement (or greenhouse) on either the supply or return line attached to a water tank. The circulation pump will keep the water-tank full of hot water at all times and you can pull hot water from the tank as needed. The tank should be plumbed to a pressurized water-source so that any time you use hot water the tank will refill and that fresh water will be heated back up by the mound circulation. Another possibility is to simply install a “manifold” on both the supply and return water-lines. This will split the circulation into as many “zones” as the manifold has so that you could move hot water through zones of a hydronic heating system (radiant-floor-loops or radiators). Any competent plumber or HVAC professional can help with these details depending on the heating application. If the mound is attached to a pressurized open water system you’ll also need a pressure-tank to accommodate the fluctuations in temp/pressure.
11. Monitor Temperature:
Your Compost Power mound should be able to produce 110-140 degree water within 10 days of construction. If the “hot mix” or foundation-layer of wood-chips gets excessively wet during construction because of rain, it may take 3-4 weeks to dry out to allow the aeration to kick-start the heating culture of the microbes in the material. A 4-foot temp-probe (Reostat) is a great tool to measure the temperature of your mound in different places.
12: BTUs and Flow-Rates:
Once your mound is up to 120-160 degrees you can fill the water-line (using a fill-valve to ensure there are no air-bubbles in a pressurized system, or by simply attaching a hose to the return-pipe to push water through the mound and out of the supply-pipe). The simplest way to calculate the btu-production of your mound is to check the temperature of the water going into the mound (most well-water is 45-50 degrees) and then track the temperature and flow-rate of the water coming out of the supply-pipe. A 30-40 yard mound with 900 feet of water line inside should be able to convert 45-degree well-water to 110-140 degree water with a sustainable flow-rate between 1 and 4 liters per minute. The sustainable flow-rate can be determined by gradually increasing the flow between 1 and 4 liters per minute and tracking the temperature of the water coming out over a period of 30-60 minutes. If the water output temperature remains steady, gradually increase the flow rate until the output temperature starts to drop. Flow-meters, temperature sensors, “thermocouples” or circulation/monitoring devices normally used with solar-hot-water systems can also be installed for on-going monitoring of the output.
13. BTU-calculation:
Once you know the output temperature of the water and the sustainable flow-rate you can calculate the BTU-output. For example, if you can sustain 3 liters per minute while turning 50-degree well-water into 130 degrees, that means you’ve got a “Delta-T” of 85 degrees and about 40 gallons of flow per hour. Multiply the number of gallons by 8.34 pounds per gallon and you get 333 pounds of water per hour. Multiply the Delta-T by the pounds and you get the BTUs per hour which in this case is about 28,000 BTUs per hour, equivalent to having a mid-sized wood stove burning at full-bore continuously. In this example, you would be able to capture more than 120 million BTUs during a 6 month winter-heating season, which is the equivalent of 7 cords of firewood burned in a 75% efficient wood-stove or $3,500 worth of propane at $3.50/gallon.
Summary Notes
Most Compost Power systems can be built in a single day with the right materials and equipment. Three to five people should be able to construct a mound this size in an eight hour period with the use of a small tractor or excavator to dump mulch onto the mound as each layer is built. Wheel-barrows and pitchforks turn this into a multi-day project (shoveling and tossing many tons of mulch is hard but satisfying work). We believe a mound this size could produce between 20,000 and 40,000 btus per hour, enough to heat an average Vermont home. A mound made of shredded bark or bark + woodchips should produce heat for twelve to eighteen months.
Feedstocks: Bark Mulch, Wood Chips, Sawdust
We believe a variety of feedstock-materials can be used to generate significant heat. Controlled tests are being conducted through UVM and other demonstration-sites to document the temperature and longevity of various combinations of mulch, chips, sawdust, manure and other compost-process materials. Some materials or mixtures may run hotter but for shorter periods of time. Hardwood materials may provide more heat than soft materials but softwoods may heat for longer periods.
It’s important for at least some of the material to be shredded or small-diameter wood-chips to provide enough surface area for the bacteria and air to reach the material and build a critical mass of activity (heat).
A mound made of wood-chips alone will produce 95 to 110-degree water for in the spring/summer/fall but will cool off in the winter. Shredded bark-mulch works very well and should provide 110 to 140-degree water as long as it’s fresh and has not been contaminated with industrial lubricants. Rot-resistant feeds-stocks like cedar, hemlock or black locust will not produce heat and are to be absolutely avoided. Pine is ok in small proportions but not recommended as the primary feedstock. Fresh double ground barks will provide about the right particle size for most projects but wood-chips mixed with sawdust and/or manure will also work. The quality of the feedstock and the aeration of the system are the main factors determining the amount of heat produced and the value of the compost after you stop collecting heat from it.
Design-Build Notes
We are experimenting with various ways to embed heat exchangers into Compost Power mounds. There are lots of possibilities but the method outlined above is the simplest and most affordable. Moisture content is important also. Too much water will fill the spaces between the particles and reduce available oxygen. Insufficient water will reduce overall biological activity. The humidity of 30% to 50% is ideal. Covering the mound with loose-packed hay or other air permeable insulation will improve winter heat output of the mound. Tubing and other materials can be recycled so the second mound should be less expensive to construct than the first. Measuring the circumference of each layer of the tubing relative to the center-stake is helpful so that you know where the tubing is when you tear down the mound. (this makes it easier to use equipment to tear it down without breaking the tubing). However, even if you break the tubing a few times while tearing down your mound, you can just splice it back together.
This Crazy Off Grid Device Literally Makes Drinkable Water From Fresh Air:
According to NASA, the U.S. is expecting a 100-YEAR LONG MEGADROUGHT.
It's already begun. Ask the farmers in California. They know.
Every survivalist knows that water is of critical importance. You NEED an independent water source that you can count on!
As an interesting "survival rehearsal" - imagine that you turned the tap on right now and nothing came out. How long would you last?
But what if there was another water source literally hidden in plain sight. That's right, I'm talking about the atmosphere!
The amazing thing about getting water from the natural moisture in the air... is that it is ALWAYS available.
This gives you real water security!
Learn more about how to tap into "Nature's secret water reservoir" and stay hydrated when TSHTF!
Watch the video:
😳 What Tinnitus Does To Your Brain Cells (And How To Stop It)
After 47 years of studies and countless brain scans done on more than 2,400 tinnitus patients, scientists at the MIT Institute found that in a shocking 96% of cases, tinnitus was actually shrinking their brain cells.
As it turns out, tinnitus and brain health are strongly linked.
Even more interesting: The reason why top army officials are not deaf after decades of hearing machine guns, bombs going off and helicopter noises…
Is because they are using something called "the wire method", a simple protocol inspired by a classified surgery on deaf people from the 1950s...

I Can't Help Showing This Off:
If you haven't heard of Claude Davis yet do yourself a huge favor and watch this video.
One of the smartest guys I ever had the pleasure of meeting, Claude set-up a unique prepping system that changed his life forever.
I already tried it myself and let me tell... you I was completely blown away... His surprising tactics could make your life easier and give you the peace of mind you deserve.
Don't just take my word for it... watch his short video and decide for yourself.

Most People Don't Have The Guts To Try This:
An amazing discovery in an abandoned house in Austin, Texas: A lost book of amazing survival knowledge, believed to have been long vanished to history, has been found in a dusty drawer in the house which belonged to a guy named Claude Davis.
Remember... back in those days, there was no electricity... no refrigerators... no law enforcement... and certainly no grocery store or supermarkets... Some of these exceptional skills are hundreds of years of old and they were learned the hard way by the early pioneers.
>> Click here to find out about them now
We've lost to history so much survival knowledge that we've become clueless compared to what our great grandfathers did or built on a daily basis to sustain their families.
Neighbors said that for the last couple of years Claude has tried to unearth and learn the forgotten ways of our great-grandparents and claimed to have found a secret of gargantuan proportions. A secret that he is about to reveal together with 3 old teachings that will change everything you think you know about preparedness:
>>> Click Here To Watch His Short Video <<<

More Off-Grid And Survival Resources:

What REALLY Happens When You Bury a Shipping Container? (Hint: It's A Bit Crazy...)
Shipping containers are all the rage - but if you are thinking about buying one, you MUST watch this video first:
There's a general belief that if you bury a shipping container you can create an awesome root cellar / storm shelter / survival bunker.
But is a shipping container strong enough to handle the pressure?
Watch the video to see what happens:
What Really Happens When You Bury a Shipping Container? (Click To Watch Video)


