Click Here To Join Our Telegram Channel for FREE daily tutorials!
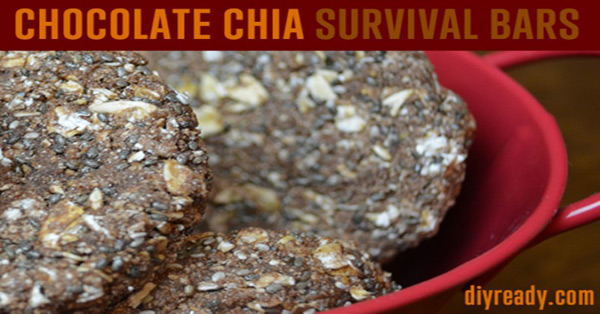
How to make homemade survival bars that actually taste good- I have now tried many of packaged survival bars, and have made a fruit flavored recipe for homemade emergency food bars with a long shelf life. I thought to myself, surely there is a better way to make a homemade survival food bar. The fruit Jello bars are good, but are awfully sweet. They also do not have the nutritional value I knew you could pack into a bar. The solution? Chocolate and Chia seeds.
If you do not know about chia seeds, keep reading. I included some nutritional info on chia, which is a pretty perfect survival food. Chia seeds pretty stay good for years, and they retain their nutritonal value as well as their flavor. They add a nice little crunch to this bar, and the chocolate combines nicely with them. I also added a scoop of protein powder to this recipe. Protein powder is one of my favorite things to add to baking mixes. It really adds value, and the flavor and texture are undetectable, at least to me. You can leave this ingredient out, if you choose.
I decided to make these bars individually. Rolling and cutting them was a tedious chore, and the bars were likely to crumble if not cut through properly. These store more easily, and it is far easier to control the exact portion size and determine nutritional value when made in the manner I describe. These round bars are much easier to get into a dehydrator. Piece of cake.
I also cut the amount of sugar from the fruit recipe. This one still has sugar, but less. I so appreciate all the wonderful feedback, comments and suggestions on the first post. I promise to keep coming up with recipes. Already have two more in mind, and at least one will be sugar free.
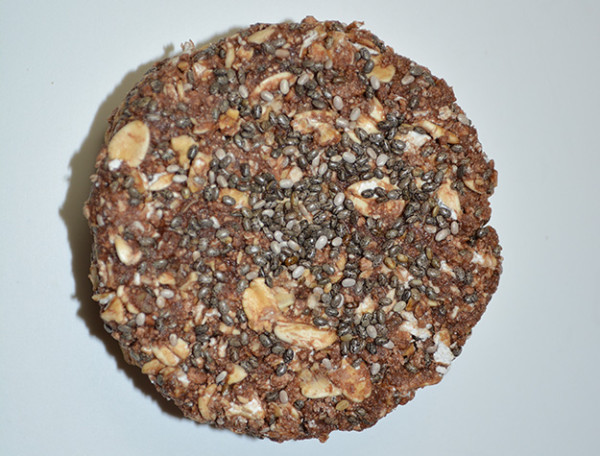 Rich in nutrients, chocolate chia survival bars will last several years.
How To Make Survival Bars:
Ingredients for Survival Bars
• 2 1/2 cups powdered dry milk
• 2 cups oats (quick or regular will work, but I like regular)
• 1/2 cup chia seeds (need chia seeds? check out my picks below to order some)
• 1/4 cup cocoa powder
• 3/4 cup sugar
• 1/2 teaspoon salt (optional)
• 2 Tablespoons Protein Powder (optional)
• 1 package plain, unflavored gelatin
• 3 Tablespoons honey
• 1/2 cup water
 Chia seeds: A perfect survival food due to shelf life and nutritional value
So what is Chia?
Chia Seed Facts:
Why chia seeds are an ideal, storable survival food
1) Nutrition: Chia seeds are a very high source of Omega 3s, linked to a wide variety of health benefits. Chia seeds also have amino acids, magnesium, and an assortment of minerals.
2) Versatile Superfood: Chia seeds can be soaked in water, juice or tea. They can be sprinkled on salads or on cereal, and can be added to bread and pancake mixes. You can make sauces, dressings and dips from them. Chia is one of the most versatile superfoods around.
3) Affordability: Chia seeds are much cheaper than most other superfoods. In terms of the nutrition chia seeds provide, they are one of the most affordable long-term storable superfoods that we know of.
4) Shelf life and storage: Chia seeds store easily for 2 – 4 years without the need for refrigeration, and 4 or more years if refrigerated. Chia seeds do not go rancid quickly like many other seeds.
5) Allergen Free: Chia contains no gluten, wheat, corn or soy. Virtually everyone can eat chia seeds, even pets and farm animals.
6) Non-GMO: Chia seeds are completely non-GMO.
7) Taste: Chia tastes great, and does not have a strong flavor like some nutritious seeds, The taste is actually more “neutral” than anything else, meaning it goes extremely well with almost any recipe you can imagine: Smoothies, cereals, bake mixes, etc.
 Ingredients: Cocoa powder, sugar, unflavored gelatin, powdered milk, chia seeds, oats
Step 1:

2 1/2 cups powdered milk

2 cups oats

1/4 cup of powdered cocoa

1/2 cup of chia seeds. (Order them online or buy in specialty grocery.)

Pour all the dry ingredients in. The order does not really matter.

Add 3/4 cup sugar.

Add 1/2 teaspoon salt. (You can omit the salt if you wish. It is added for flavor)

Add 2 tablespoons of protein powder, also optional, but recommended
Step 2: Stir dry ingredients

Stir the dry ingredients with a spoon.

Stir the dry ingredients together by hand.

Mix well to get the chia seeds and other ingredients evenly distributed.
Step 3: Combine gelatin, honey and water

One package of unflavored gelatin.

3 Tablespoons of honey
Add 1/2 cup of water (not pictured)
Step 4: Stir over medium heat until it boils
Stirring as you heat it, let the mixture come to a rolling boil. This is when the mixture keeps boiling even when stirred. Do not overheat.

Over medium heat, let the mixture come to a rolling boil. Stir well while heating.
Step 5: Add liquid to dry ingredients and mix
Pour the liquid mixture into your mixing bowl with the dry mixture. I highly recommend using an electric mixer, preferably a good one. This dough is thicker than most. A good mixer will have no problem. Mixing by hand will require patience. You will need to check the consistency of the dough. It should mash into a ball in your hand, not crumble. Add water, 1 tablespoon at a time, until your dough forms a ball as shown. You do not, however, want to add too much water. You only want to add enough to stick, and you may not need to add any at all.

Pour the liquid mixture into the dry mixture

Turn the mixer on low and mix until combined well. A couple of minutes should do.

Use a spatula or spoon to scrape the dough from the sides. This helps it mix more evenly.
Step 6: Check consistency

Take a handle of dough. Press it in your hand. If it crumbles, you will need water.
Step 6: Add water if needed
Add water 1 tablespoon at a time until the dough will form in your hand. If it still crumbles, you need water. Do not add too much. Add one tablespoon, mix, check. Add more as needed. You may not need to add any, but in dry climates, this is often necessary.

Add 1 tablespoon of water at a time

Check consistency again by pressing in your hand.
Step 7: Measure portions, pack and form
I used a 1/4 cup scoop to measure my bars. ( I am measuring the 1/4 cup before packing the dough in the cup) Then, I packed the mix in, turned it over on a wooden cutting board, and flattened the bars, rounding the edges with my hand. You will need a nonstick surface for this. A wooden cutting board is recommended.

Measure equal scoops, using a 1/4 cup measure or one of your choice. **If you want to know nutritional value, you can always do the math based on the number you get when finished.**

Press the dough into the measuring cup. You want to pack it tightly, but do not need to work too hard at it.

Flip the cup over into your hand or onto the board.

Flatten with your hand pressing down firmly.

Squeeze the sides in a bit to smooth the edges. You can make these as pretty and as perfect as you want, or you can do just enough to get them to stick together. Your call.

A finished bar looks like this.
Step 7: Repeat Step 6 until finished
This recipe makes approximately 16 bars when you use a 1/4 cup measure.

Step 8: Bake or dehydrate your bars
Baking Instructions:
Heat your oven to 200 degrees. Place the bars on a cookie sheet and bake for 2 hours. Cool before storing


Dehydrating Instructions:
Place your bars on a dehydrator rack, spacing them so that they do not touch. Dehydrate for 3 hours. Cool before storing.


Step 9: Store bars, or serve.
I served mine…We had to try them. I still have a few left, but more were eaten than not. A good sign. Would love to know what you think when you try them!

By Stephanie
This Crazy Off Grid Device Literally Makes Drinkable Water From Fresh Air:
According to NASA, the U.S. is expecting a 100-YEAR LONG MEGADROUGHT.
It's already begun. Ask the farmers in California. They know.
Every survivalist knows that water is of critical importance. You NEED an independent water source that you can count on!
As an interesting "survival rehearsal" - imagine that you turned the tap on right now and nothing came out. How long would you last?
But what if there was another water source literally hidden in plain sight. That's right, I'm talking about the atmosphere!
The amazing thing about getting water from the natural moisture in the air... is that it is ALWAYS available.
This gives you real water security!
Learn more about how to tap into "Nature's secret water reservoir" and stay hydrated when TSHTF!
Watch the video:
😳 What Tinnitus Does To Your Brain Cells (And How To Stop It)
After 47 years of studies and countless brain scans done on more than 2,400 tinnitus patients, scientists at the MIT Institute found that in a shocking 96% of cases, tinnitus was actually shrinking their brain cells.
As it turns out, tinnitus and brain health are strongly linked.
Even more interesting: The reason why top army officials are not deaf after decades of hearing machine guns, bombs going off and helicopter noises…
Is because they are using something called "the wire method", a simple protocol inspired by a classified surgery on deaf people from the 1950s...

I Can't Help Showing This Off:
If you haven't heard of Claude Davis yet do yourself a huge favor and watch this video.
One of the smartest guys I ever had the pleasure of meeting, Claude set-up a unique prepping system that changed his life forever.
I already tried it myself and let me tell... you I was completely blown away... His surprising tactics could make your life easier and give you the peace of mind you deserve.
Don't just take my word for it... watch his short video and decide for yourself.

Most People Don't Have The Guts To Try This:
An amazing discovery in an abandoned house in Austin, Texas: A lost book of amazing survival knowledge, believed to have been long vanished to history, has been found in a dusty drawer in the house which belonged to a guy named Claude Davis.
Remember... back in those days, there was no electricity... no refrigerators... no law enforcement... and certainly no grocery store or supermarkets... Some of these exceptional skills are hundreds of years of old and they were learned the hard way by the early pioneers.
>> Click here to find out about them now
We've lost to history so much survival knowledge that we've become clueless compared to what our great grandfathers did or built on a daily basis to sustain their families.
Neighbors said that for the last couple of years Claude has tried to unearth and learn the forgotten ways of our great-grandparents and claimed to have found a secret of gargantuan proportions. A secret that he is about to reveal together with 3 old teachings that will change everything you think you know about preparedness:
>>> Click Here To Watch His Short Video <<<

More Off-Grid And Survival Resources:

What REALLY Happens When You Bury a Shipping Container? (Hint: It's A Bit Crazy...)
Shipping containers are all the rage - but if you are thinking about buying one, you MUST watch this video first:
There's a general belief that if you bury a shipping container you can create an awesome root cellar / storm shelter / survival bunker.
But is a shipping container strong enough to handle the pressure?
Watch the video to see what happens:
What Really Happens When You Bury a Shipping Container? (Click To Watch Video)






I prefer chia seeds soaked for 15 minutes before adding them to recipes to increase their health benefits.. Do you think that would work well in this survival recipe?